Previous Vehicles and Data
![]()
The Previous Vehicles and Data icon is located on the Home screen. This function allows you to select recently tested vehicles and access saved data files.
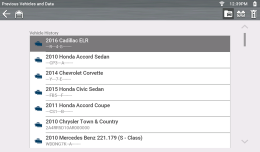
Vehicle History
The diagnostic tool stores the identification of the last twenty-five vehicles tested, so there is no need to go through the complete vehicle identification sequence when performing a retest after repairs have been made. The oldest vehicle record is deleted when a new vehicle is identified once there are twenty-five vehicles on file.
Home Screen: Previous Vehicles and Data > Vehicle History
A list of up to 25 previously tested vehicles displays. Each vehicle is given a unique file name. Scroll to view the entire list.
| 1. | With the item to be opened highlighted, either select the vehicle ID or press the Y/a button. |
The appropriate software loads and a vehicle ID confirmation screen displays.
| 2. | Select OK or press the Y/a button to continue. |
The System Menu for the selected vehicle displays.
View Saved Data
Home Screen: Previous Vehicles and Data > Saved Data
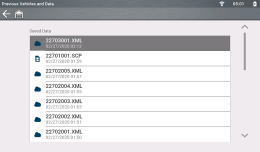
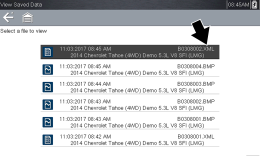
Selecting the View Saved Data menu option opens a list of all the saved data (movie) files and screen images that are stored in memory. Saved files are listed in chronological order by the date and time that they were created with the most recent files are at the top of the list.
Selecting a file from the list, opens the file.
Saved data files can also be downloaded to a personal computer (PC) using ShopStream Connect™ *
A maximum of 50 files are displayed. To view all (if more than 50) files stored, transfer the files to a PC and use ShopStream Connect™
| 1. | Select Previous Vehicles and Data from the Home screen. |
| 2. | Select View Saved Data from the menu. |
| 3. | Select a file to review from the list. |
Viewing Codes and Code Scan Results
Home Screen: Previous Vehicles and Data > Saved Data
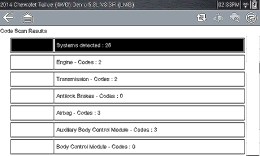
When code scan or single system code results are saved, they are saved in (.XML) file format on the tool. Depending on your tool they may also be sent to your Snap-on Cloud account.
The saved (.XML) file(s) can be viewed:
| ● | On the diagnostic tool, selecting a system code or a code scan .XML file from the saved file list, opens that file onscreen. |
| ● | In ShopStream Connect, see ShopStream Connect™ * |
| ● | On the Snap-on Cloud, see Snap-on Cloud * |
Delete Saved Data
This option is used to permanently erase saved files from memory.
Home Screen: Previous Vehicles and Data > Delete Saved Data
| 1. | Select Previous Vehicles and Data> Delete Saved Data. |
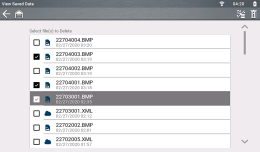
The list of saved files displays.
| 2. | Select the file(s) to be deleted using the checkboxes. |
| 3. | Use the Select All / Deselect All icon |
| 4. | The files with checkboxes will be deleted. To delete the files select the Delete icon |
| 5. | A confirmation message displays. Select an option: |
| – | OK—permanently deletes the selected file |
| – | Cancel—returns to the saved files list without deleting the selected file. |
