Starting SSC / Basic Navigation
Connect the diagnostic tool to your PC using a USB cable, or using an alternate method. See section Connecting the USB Cable - PC to Tool , and the applicable diagnostic tool instructions within that section.
In most instances, ShopStream Connect will automatically open on the PC when the tool establishes communication with the PC. See Options - (see below) for information on using the Autostart function.
If needed, SSC can be started manually. Startup can vary depending on the Windows operating system. Typically SSC can be started from:
|
●
|
The ShopStream Connect icon  on the Windows desktop (automatically created during installation) on the Windows desktop (automatically created during installation) |
|
–
|
Double-click ShopStream Connect icon. |
|
–
|
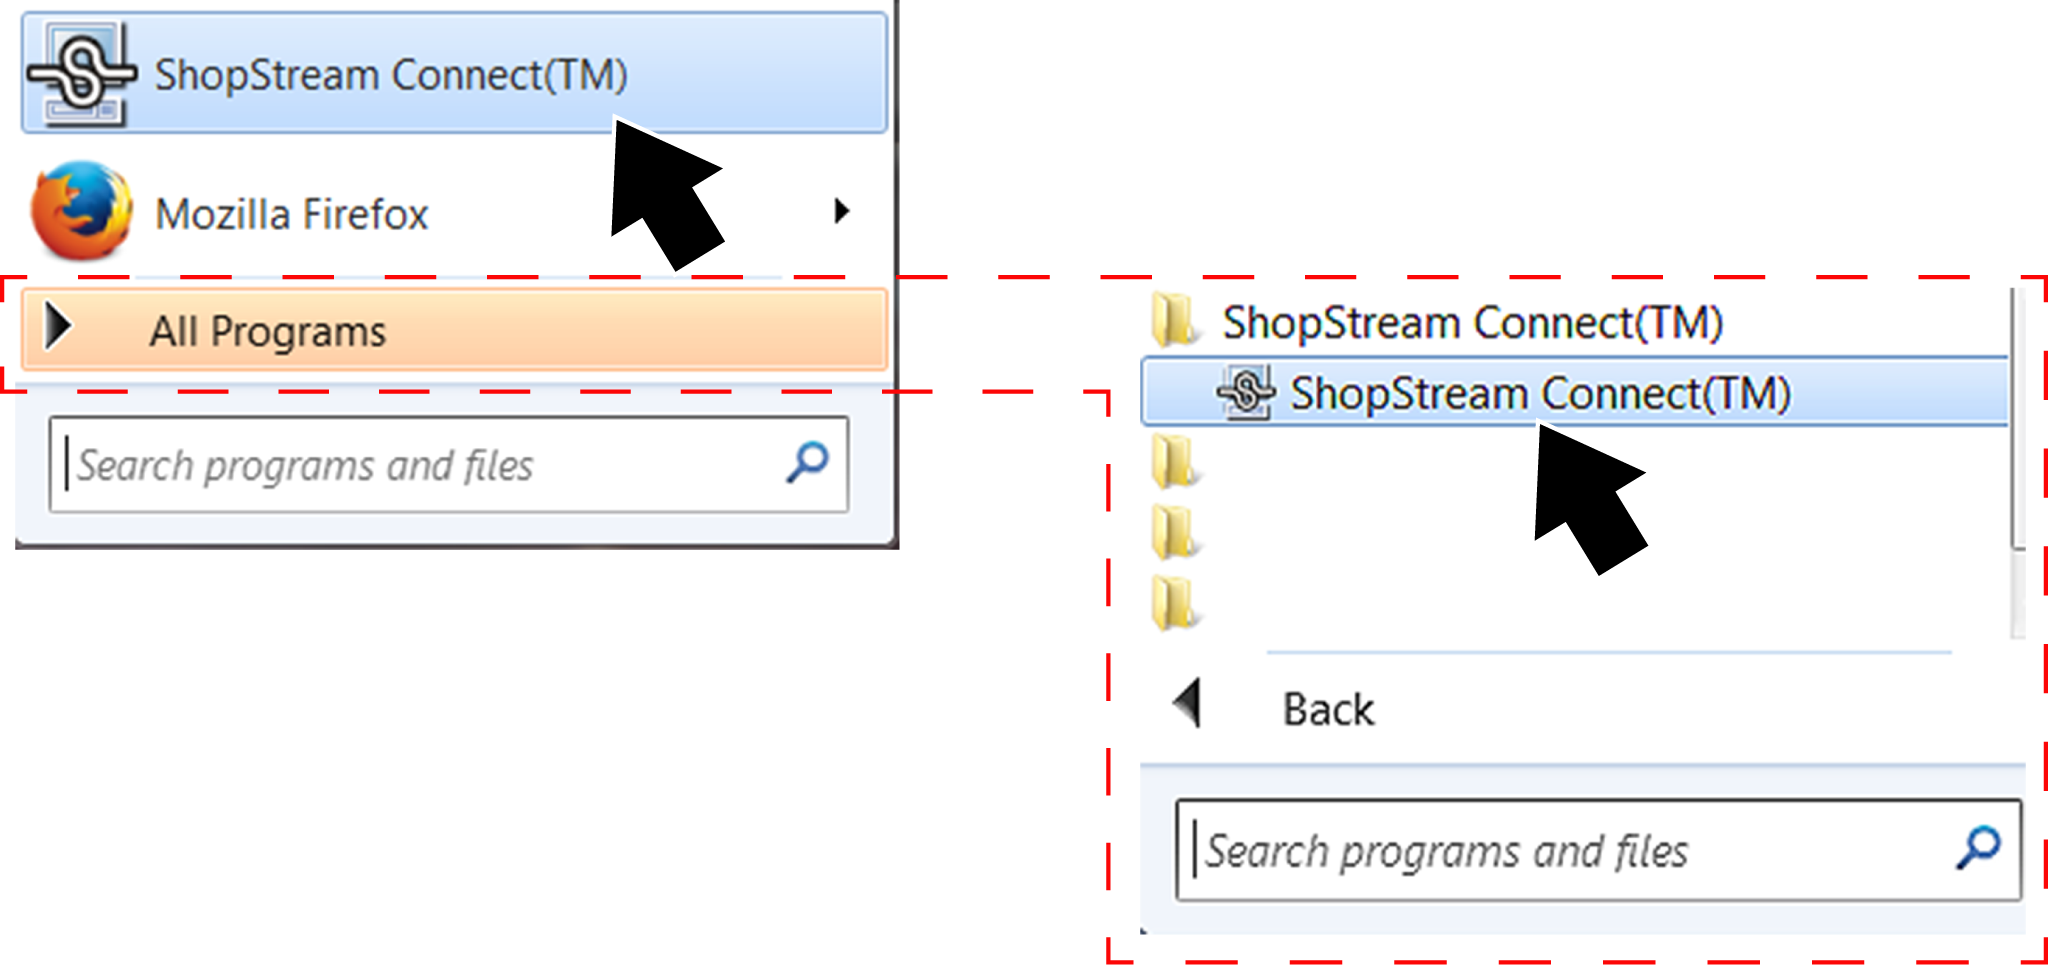
Select ShopStream Connect directly from the Start Menu (Left Figure) programs if available, or |
|
–
|
Select Start > All Programs > ShopStream Connect > ShopStream Connect (Right Figure) |
Basic Navigation / Menus
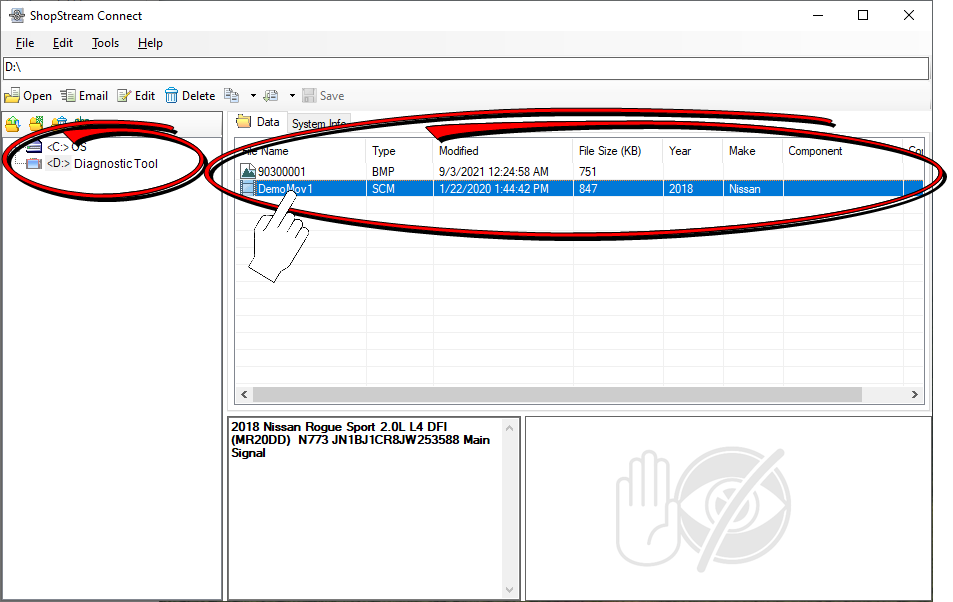
When the application opens, it should display the data stored on your diagnostic tool (if your tool is connected with the PC via USB).
If it does not open to display your data in the directory, select your applicable diagnostic tool from the file directory list.
ShopStream Connect uses the basic Windows interface to allow you to transfer files bi-directionally between your diagnostic tool and your PC.
When a diagnostic tool is connected to your PC using ShopStream Connect, a diagnostic tool folder is created on your PC named after the tool. This folder allows you to store and transfer files.
The location of the diagnostic tool “target destination” folders on your PC is defined during the installation of ShopStream Connect. The “target destination” folder names and location can be changed at anytime by choosing (from main menu) Tools > Options > Change ShopStream Data Path. Follow the onscreen instructions to create or rename your new “target destination” folder and/or location.
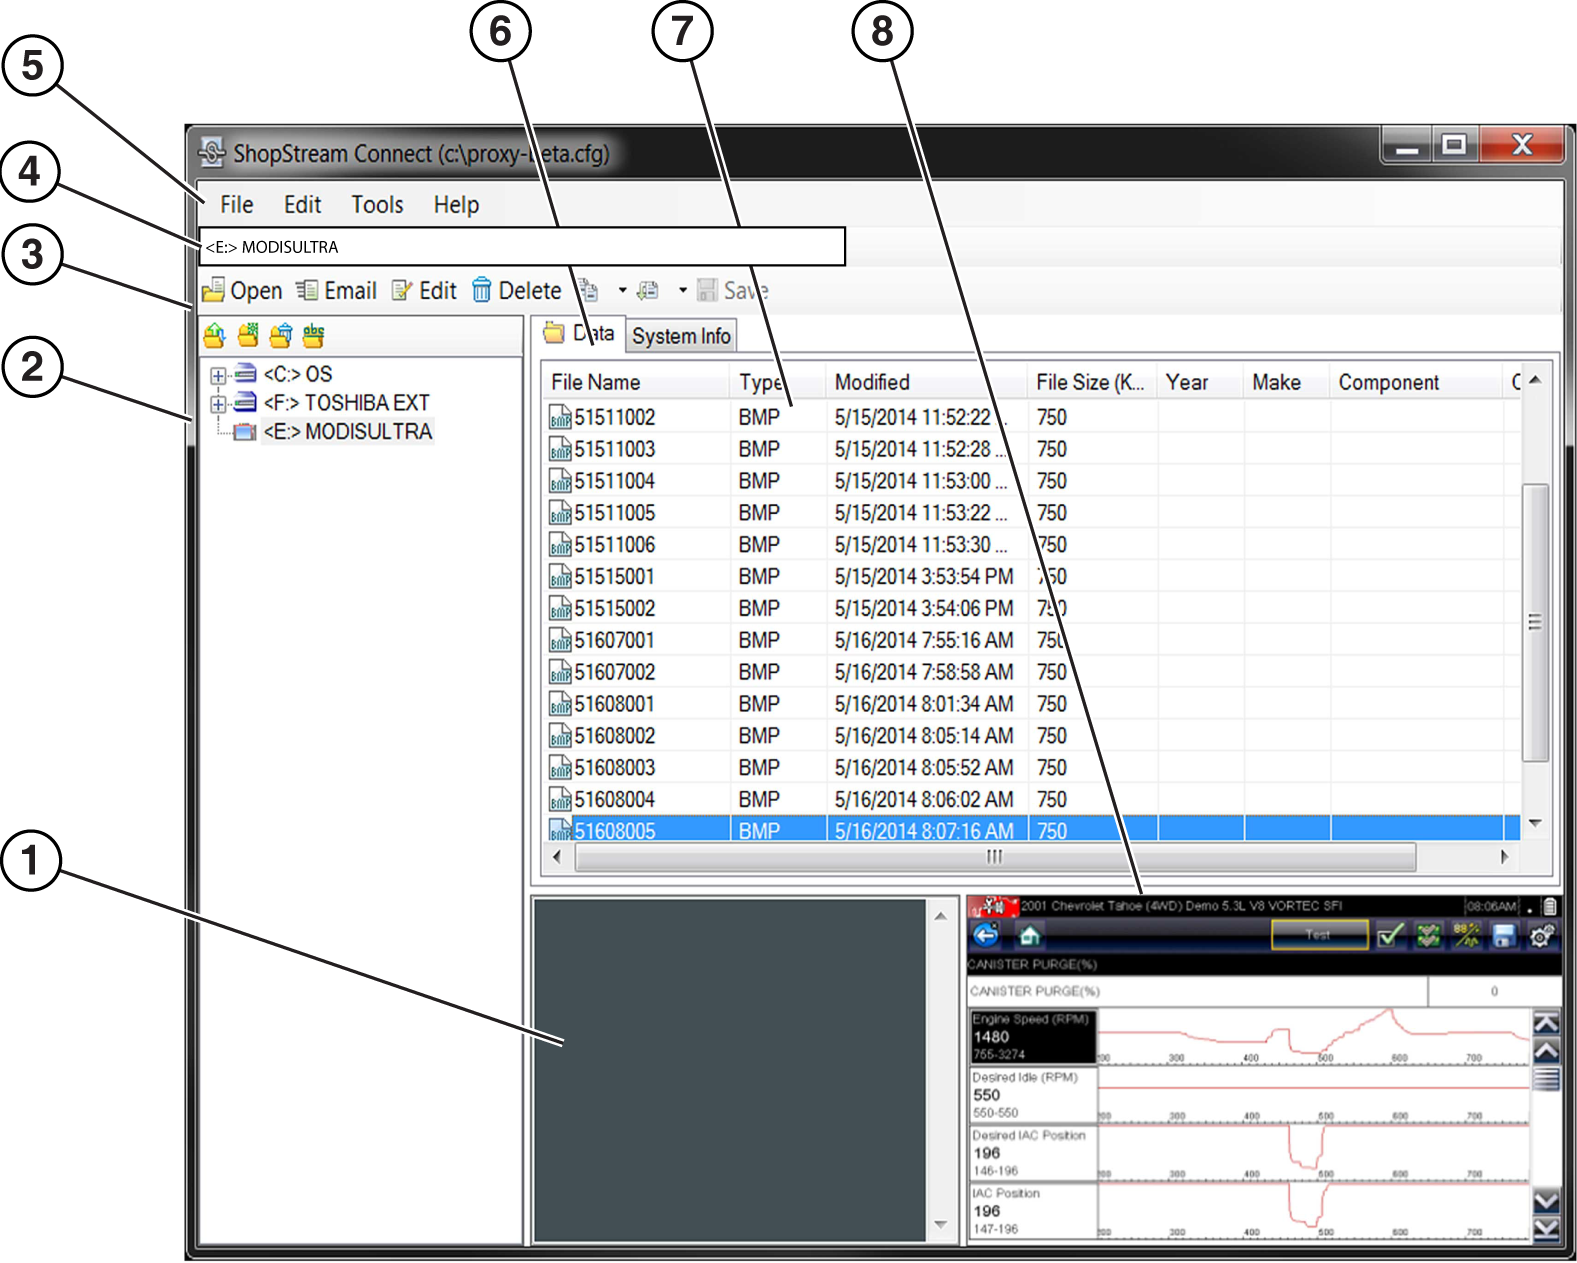
Main Screen Layout
Main Menu Bar
File and Edit
File and Edit menus include standard Windows control options.
Tools
Update Software - Download updates and upgrades for your diagnostic tools and ShopStream Connect software. See Updating and Upgrading Software Using SSC
Options - (see below)
|
–
|
Allows you to set ShopStream Connect to automatically launch whenever a diagnostic tool in Connect-to-PC mode is connected to the PC, or a micro SC or CF card from a tool is recognized by your PC. |
|
–
|
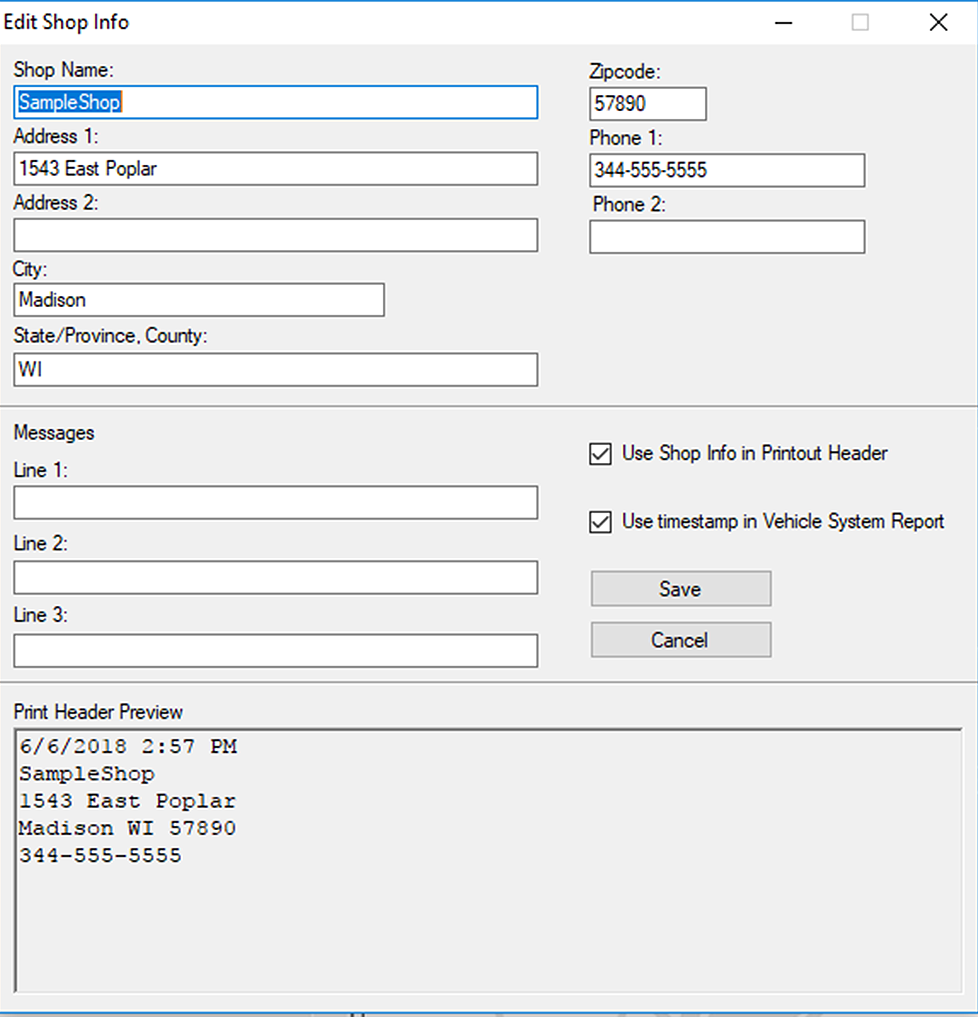
Allows you to add your shop name and information to printed files and reports. |
|
–
|
Check the “Use Shop Info in Printout Header” box to automatically include the header on printed files. |
|
–
|
Check the “Use timestamp in Vehicle System Report” to enable the timestamp on the report. |
|
●
|
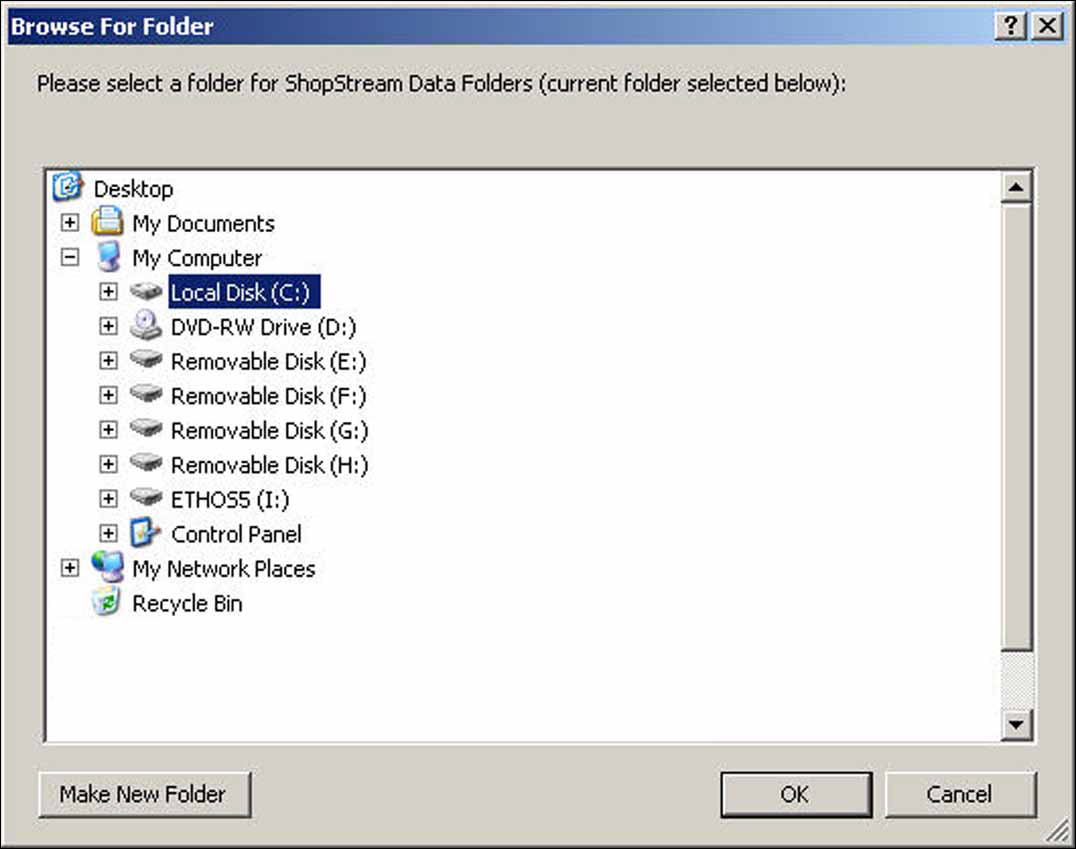
Change ShopStream Data Folder Path
|
|
–
|
Allows you to select a different target destination for the diagnostic tools folder on your PC. When a diagnostic tool is initially connected to a PC using ShopStream Connect, a diagnostic tool folder is created and named after the connected tool (e.g. TRITON D8, APOLLO D9, etc). |
|
–
|
Follow the onscreen instructions to select or create your new “target destination” folder and/or location. |
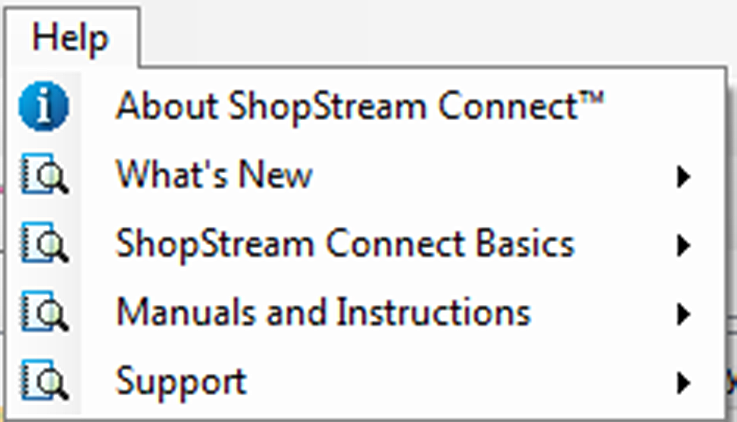
Help Menu
The Help menu includes SSC software information and links to help topics.