Windows (Applicable Features / Operations)
The ShopStream Diagnostic Suite program runs on the Microsoft Windows 10 operating system. This section includes introductory information on some of the Windows features and programs that are applicable with the operation of the ShopStream Diagnostic Suite program.
Specific Windows features and instructions are beyond the scope of this manual, please refer to Microsoft Windows 10 user documentation for additional information.
The notification area contains icons that provide active status and notifications of selected programs. The notification area may contain standard Windows application icons (e.g. Wireless Network Connection Status, Audio volume, etc.) and specialized application icons designed for use only on this diagnostic tool (e.g. ShopStream Update Tool and Virtual Keyboard).
For additional information on the ShopStream Update Tool and Virtual Keyboard, see:
ShopStream Update Tool - ShopStream Update Tool (SST)
Virtual Keyboard - Virtual Keyboard (Entering Text)
The capacitive touch screen is used to control almost all the operations of the diagnostic tool. Simply touch the screen with your finger, or use the capacitive stylus to make a selection. The capacitive touch screen also provides you with multi-touch gesture capabilities found on common surface touch devices. Most operations are menu driven, which allows you to quickly locate the test, procedure, or data that you need through a series of choices and questions. Detailed descriptions of the menu structures are found in the sections for the various functions.
For information on touch screen calibration, maintenance and stylus tip replacement:
Touch screen calibration - see Calibrating the Touch Screen
Touch screen maintenance - see Care and Cleaning
Stylus tip replacement - see Tip Replacement
This device uses common touch screen gesture motions (e.g. pinch-to-zoom, press and tap, pan and swipe). The terms used to describe the various gestures may vary (industry wide), however the general procedures and usage are similar for specific operations.
|
Common Gesture Names |
General Procedure |
Common Usage |
|
Tap |
Quickly tap a point (once), then release. |
Make a selection (e.g. open application). |
|
Pinch open/close |
Touch two points, then move your fingers toward or away from each other. |
Zoom the display in or out, to make a selection (e.g. image or picture) larger or smaller. |
|
Touch and hold |
Touch a point and maintain light pressure. |
Make a selection. |
|
Touch and drag |
Touch a point, then while maintaining light pressure, drag in the desired direction. |
Move onscreen controls (e.g. scrollbars and slidebars). |
|
Swipe |
In a quick and continuous motion, select a point and quickly swipe in the desired direction while lifting off the screen. |
Quickly scroll or move through content. |
|
Press and tap |
Touch a point, then while maintaining light pressure, tap (in the same general area) with another finger. |
Open alternate menus (similar to right click). |
The information provided in the above table is not inclusive, may vary and is intended as a general guide only. For additional information on Windows touch screen operations, see Windows 10 and Windows “Touch Gesture” user documentation. Also refer to Pen and Touch settings in the Windows Control Panel for additional information and settings.
The Windows Touch Keyboard (Virtual Keyboard) allows you to type characters and key in information to complete form and data entry fields, similar to a physical keyboard.
The virtual keyboard is normally running in the Windows background and can be opened in the following ways:
| ● | Shortcut (S) button - choose the Virtual Keyboard icon from the Shortcut (S) button menu |
| ● | Windows notification area - choose the Virtual Keyboard icon in the Windows notification area |
As an alternative, you can connect a USB keyboard to the diagnostic tool and use it to key in information.
Virtual Keyboard icon in notification area
The Windows operating system uses Sleep Mode to conserve power by stopping all processes and turning off the display screen, while keeping the diagnostic tool on and your open applications active. When you are ready to resume work, the diagnostic tool can be started up again quickly, just by pressing the Power button.
Sleep Mode settings can be found in Windows Control Panel > Power Options. For additional information, refer to Windows 10 user documentation.
It is recommended that you terminate current vehicle communication and save any open working files or data before entering Sleep Mode, to avoid ECM problems (on some vehicles) or data loss from unforeseen circumstances (e.g. power loss).
If Sleep Mode is accidentally activated during active vehicle communication, vehicle communication will stop, vehicle selection will be reset to “no active vehicle” and the Home screen is displayed.
To Enter Sleep Mode
Press and release the Power button.
The display screen will turn off, and the Battery Status Indicator located on the upper right screen will light up red, blinking on and off at two second intervals
A blinking Red battery charge indicator ![]() (on and off at two second intervals) indicates the diagnostic tool is in Sleep Mode.
(on and off at two second intervals) indicates the diagnostic tool is in Sleep Mode.
To exit Sleep Mode (wake up):
| 1. | Press and release the Power button. |
The display screen will turn on and resume the last open application. Depending on settings, you may need to select your user ID icon to open the last application.
The Data Manager function features an e-mail option that allows you to send a saved data or image files as an e-mail attachment. To use this feature, you must install an e-mail client, and then link your existing e-mail address to the client.
The following instructions are intended as a guide only, as e-mail client setup procedures vary. See Email for information on sending e-mails from Data Manager.
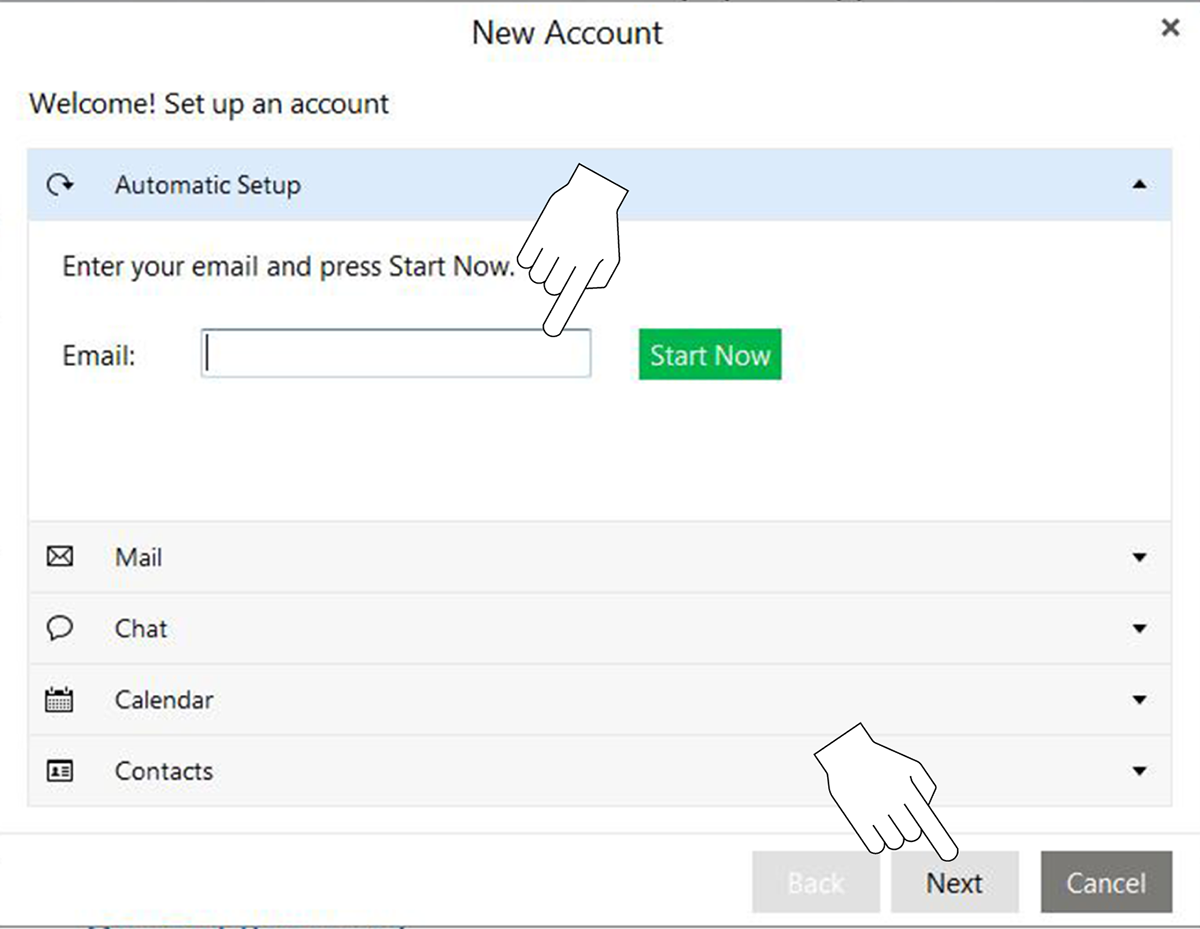
E-mail client installation and setup (Example):
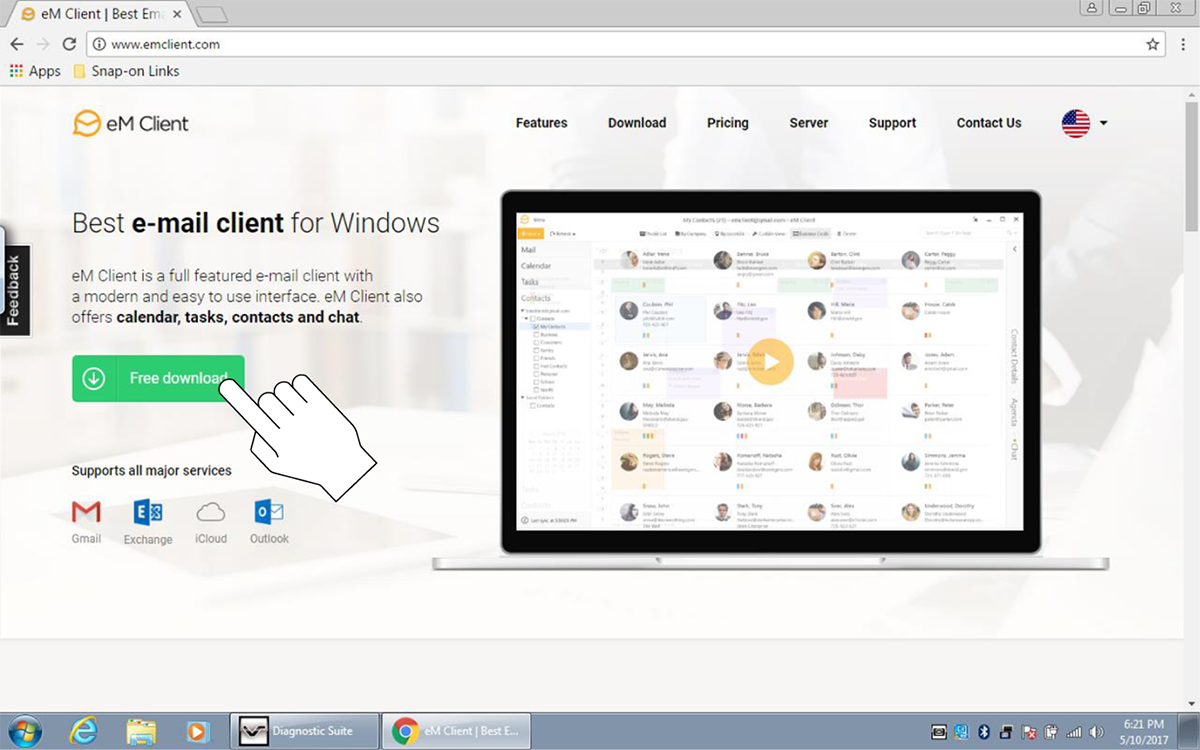
| 1. | Download an email client (e.g. eM Client). |
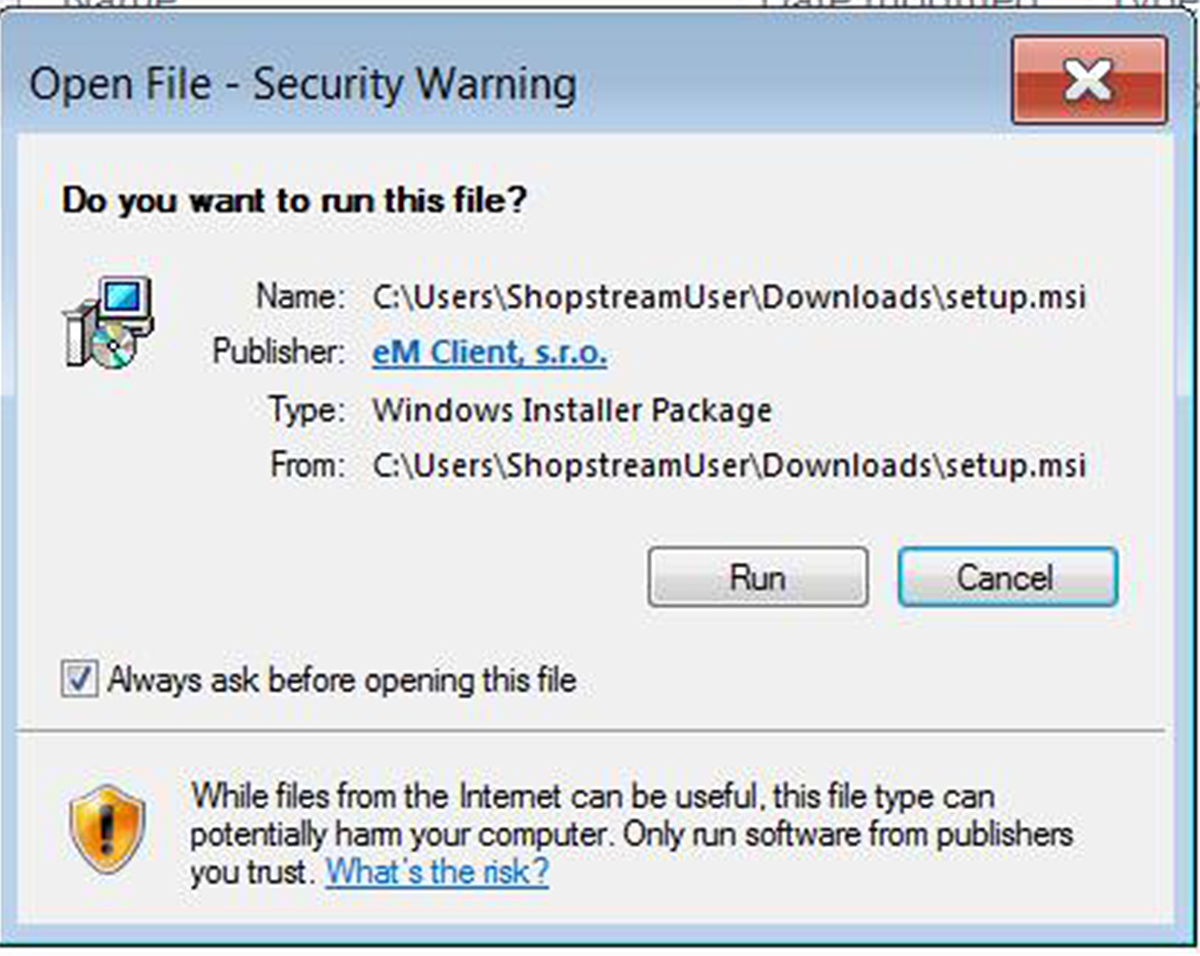
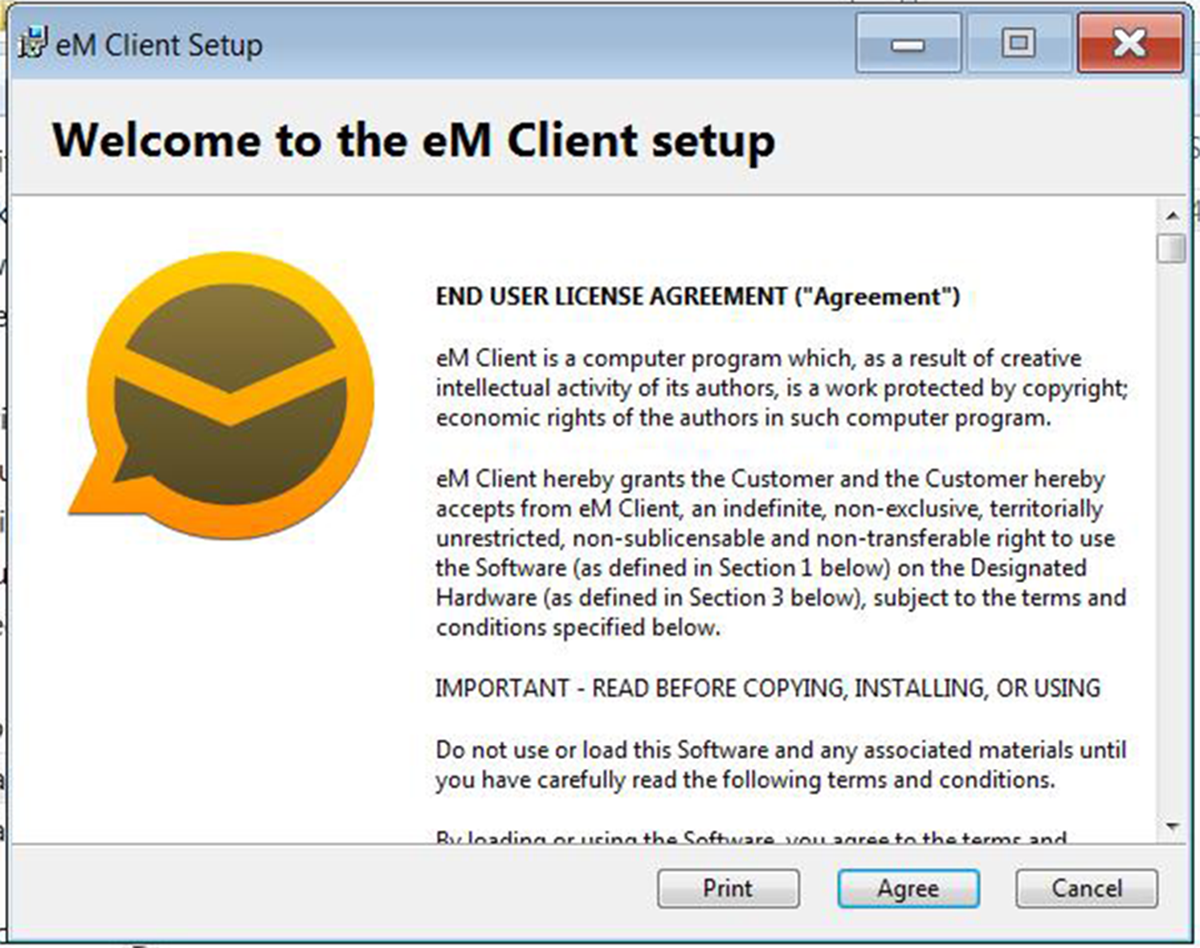
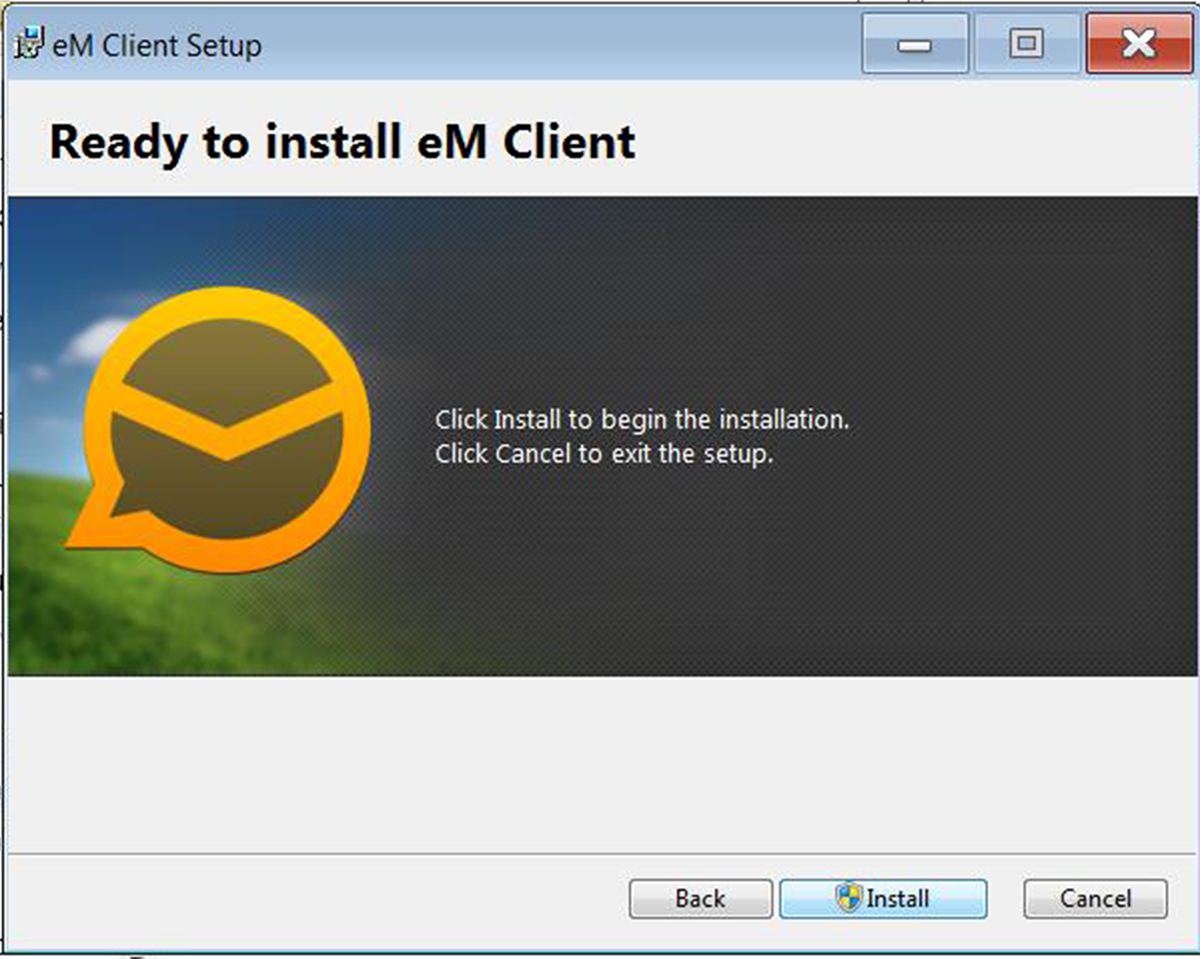
| 2. | Install the software following the screen prompts. |
| 3. | The Data Manager e-mail feature uses the Windows system e-mail client. |
| 4. | Select “Use this client as default application” option when prompted. This sets the client as the Windows system e-mail client. |
| 5. | Enter your e-mail information as required. |
E-mail client configuration settings should automatically be set during installation. If problems arise with the setup and manual configuration is needed, refer to the e-mail client help information and the Windows help information.
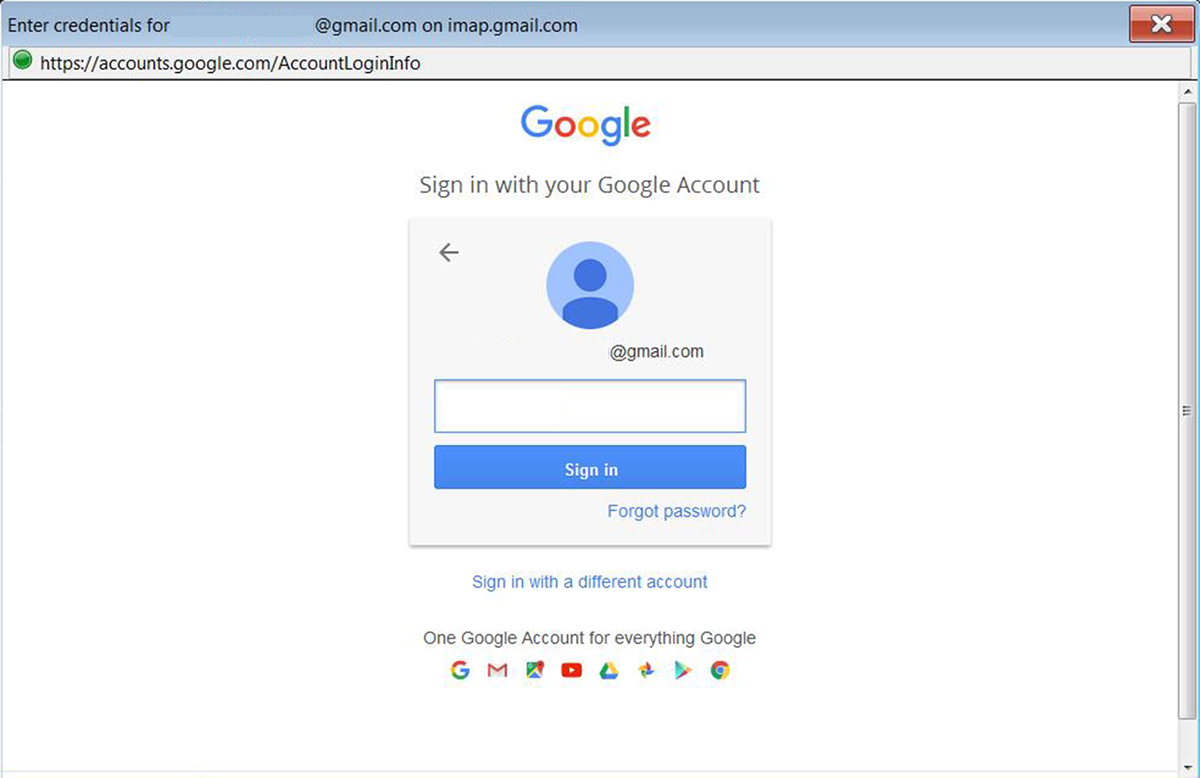
| 6. | If your existing email provider login screen displays, enter your email address and password to allow the client to continue the setup with your provider. |
| 7. | Follow the screen prompts to allow the client to link to your email address. |
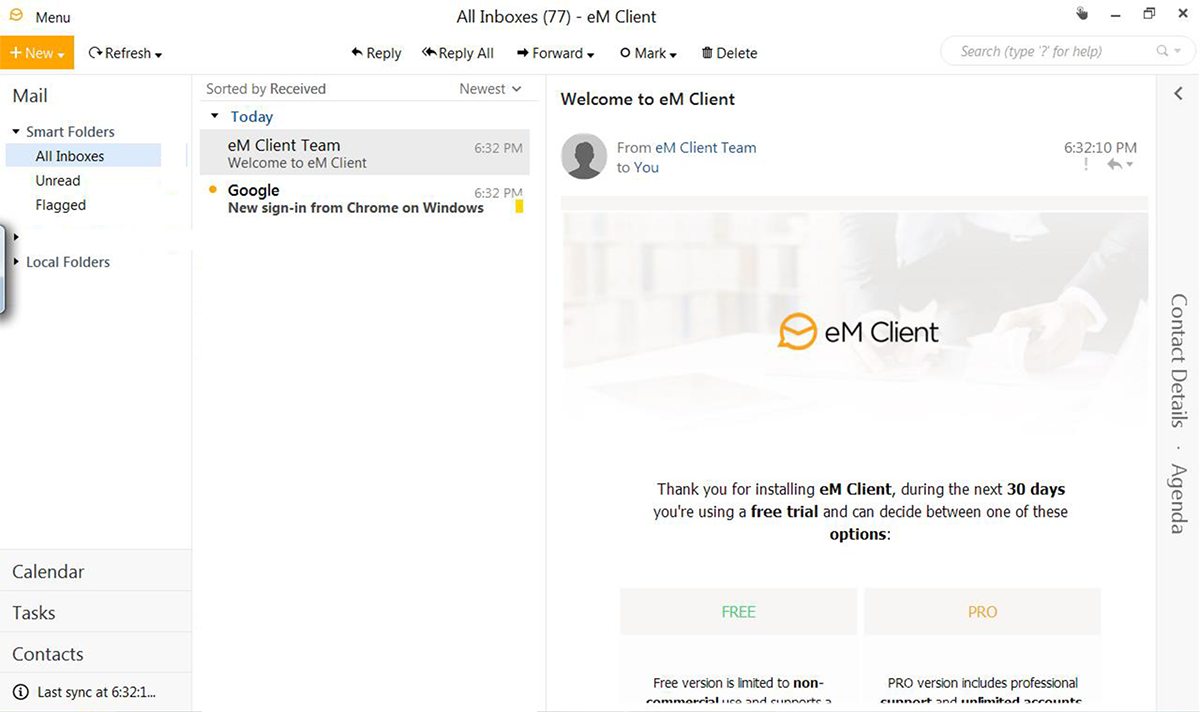
| 8. | Once the client has successfully linked to your address, you can begin using the new e-mail client software on the diagnostic tool . |
The touch screen can be calibrated for accuracy using the Windows Tablet PC Settings.
To calibrate the touch screen:
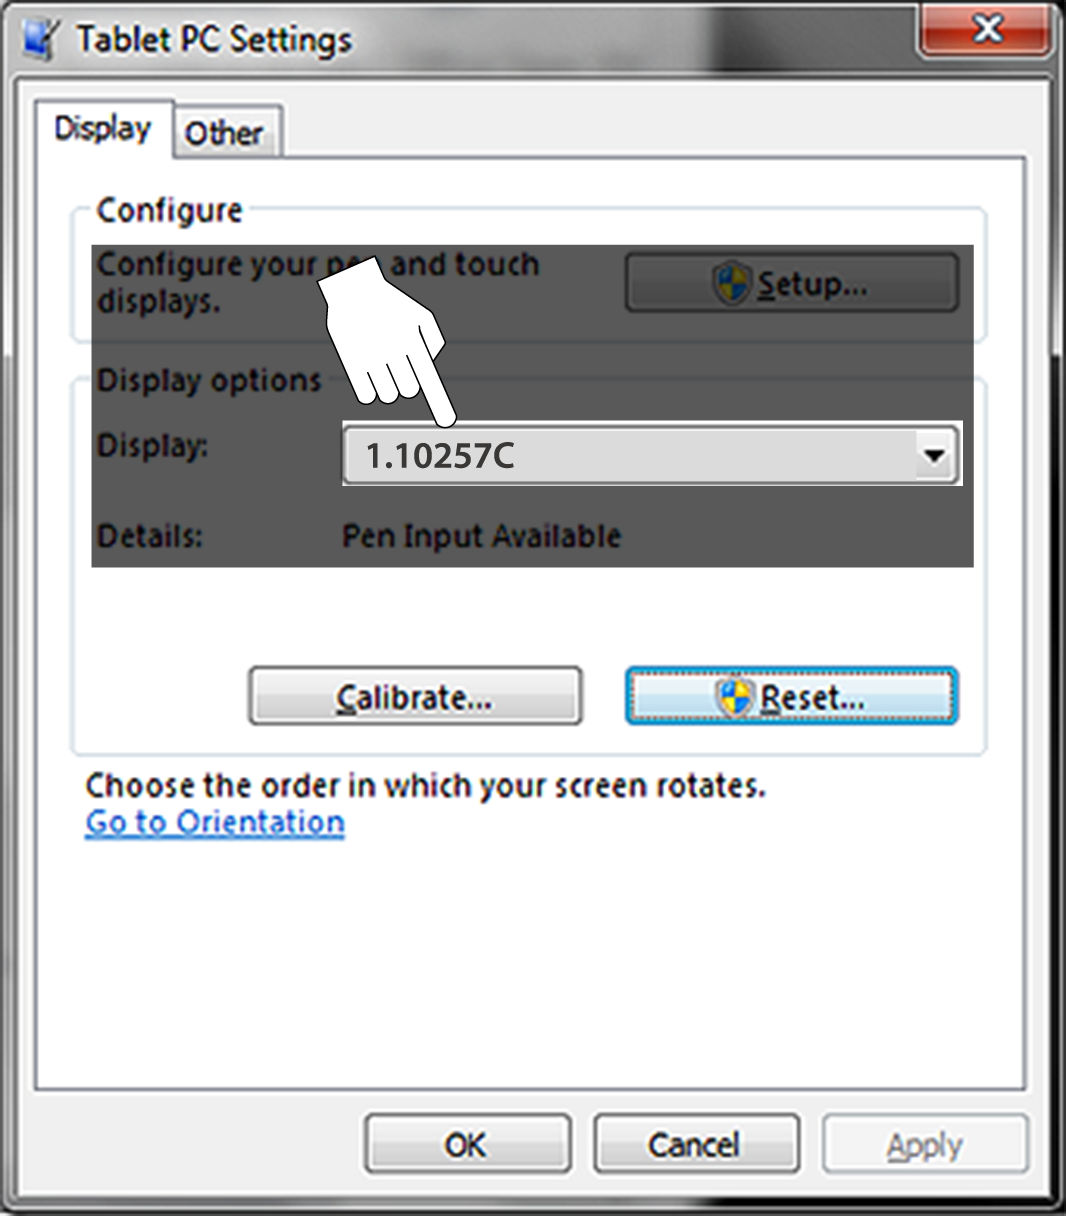
| 1. | From the Windows menu select Start>Control Panel > Hardware and Sound >Tablet PC Settings. |
The Tablet PC Setting window is displayed .
| 2. | Select the diagnostic tool display from the dropdown list. The current default diagnostic tool display number “1.10257C” is shown above as an example. |
If you are using an optional touch screen (e.g. using an external touch screen with a Tech Cart and docking station), there will be an additional touch screen choice displayed.
| 3. | Select Calibrate. |
The Calibration screen is displayed .
| 4. | Using the stylus, follow the screen prompts and tap on the center of the cross-hairs as they appear at each corner on the screen . |
To achieve the best results, it is recommended to use the capacitive stylus when performing the touch screen calibration.
Calibrating the Touch Screen
| 5. | Select OK to close the dialog boxes once the calibration is complete. |
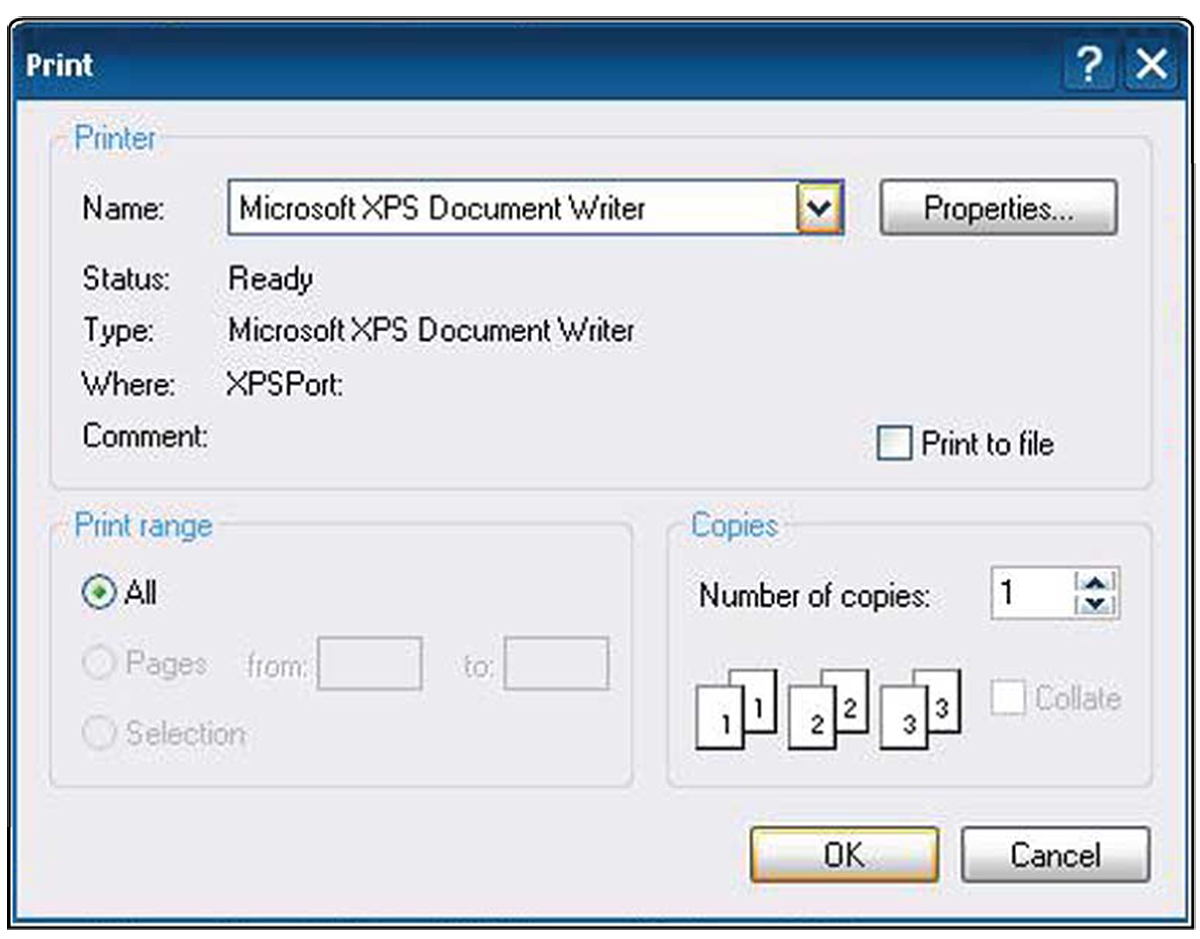
Selecting Print opens a standard Windows Print dialog box.
To print, a printer must installed and set as the system default printer. The following sections provide basic instructions for local printer setup.
The factory default printer setting is (.XPS file format). From the standard Windows print dialog box, you can name the file and specify the location that it is saved to. The file can then be viewed onscreen using the Windows XPS Viewer.
Typical Print dialog box
To print a code scan Vehicle System Report, Adobe Reader must first be installed. See Checking/Installing Adobe® Reader.
The following is intended as a basic printer setup instruction only. Printer setup will vary. For specific instructions and details, refer to your printer setup information and the online Windows printer setup help information.
There are three basic methods to connect a printer to the diagnostic tool, using a USB cable, connecting over a Wireless Network and Direct Wireless connection. Basic connection instruction are provided in the following sections.
| 1. | Turn the printer on. |
| 2. | Connect the USB cable from the printer to the diagnostic tool. |
| 3. | Windows should automatically detect and install the printer. |
| 4. | Follow the onscreen instructions to install the printer and then set the printer as the default printer. See Default Printer Setting. |
If the printer driver files are not automatically installed, you will have to manually install the printer driver files. Printer driver files may be supplied with the printer (e.g. CD or memory stick), or check the printer manufacturer’s website to download the files. Follow the manufacturer’s instructions for driver installation.
If your printer is Wi-Fi enabled, you may have options to connect the diagnostic tool to the printer using an existing Wi-Fi network (through a router), or connect directly to the printer wirelessly.
Connecting to an existing Wi-Fi network is the most common method, as this allows you to connect to the printer and stay connected to the Internet (if applicable).
You may only connect to one network, therefore when connecting directly to your wireless printer, any other active wireless connection will be disconnected.
Use the following instructions (as a guide) if you choose to connect the diagnostic tool to the printer through your existing network.
| 1. | Turn your printer on and make sure it is setup per the manufacturers instructions. |
| 2. | Connect the printer to your wireless network. A password may be required when connecting to a protected network. Note the printer connection IP address when it connects to the network. |
| 3. | From the diagnostic tool, select the Windows icon on the desktop (lower left). |
| 4. | Select Devices and Printers (right-side menu). |
| 5. | Select Add a Printer from the toolbar. |
| 6. | Select Add Network, Wireless or Bluetooth Printer”. |
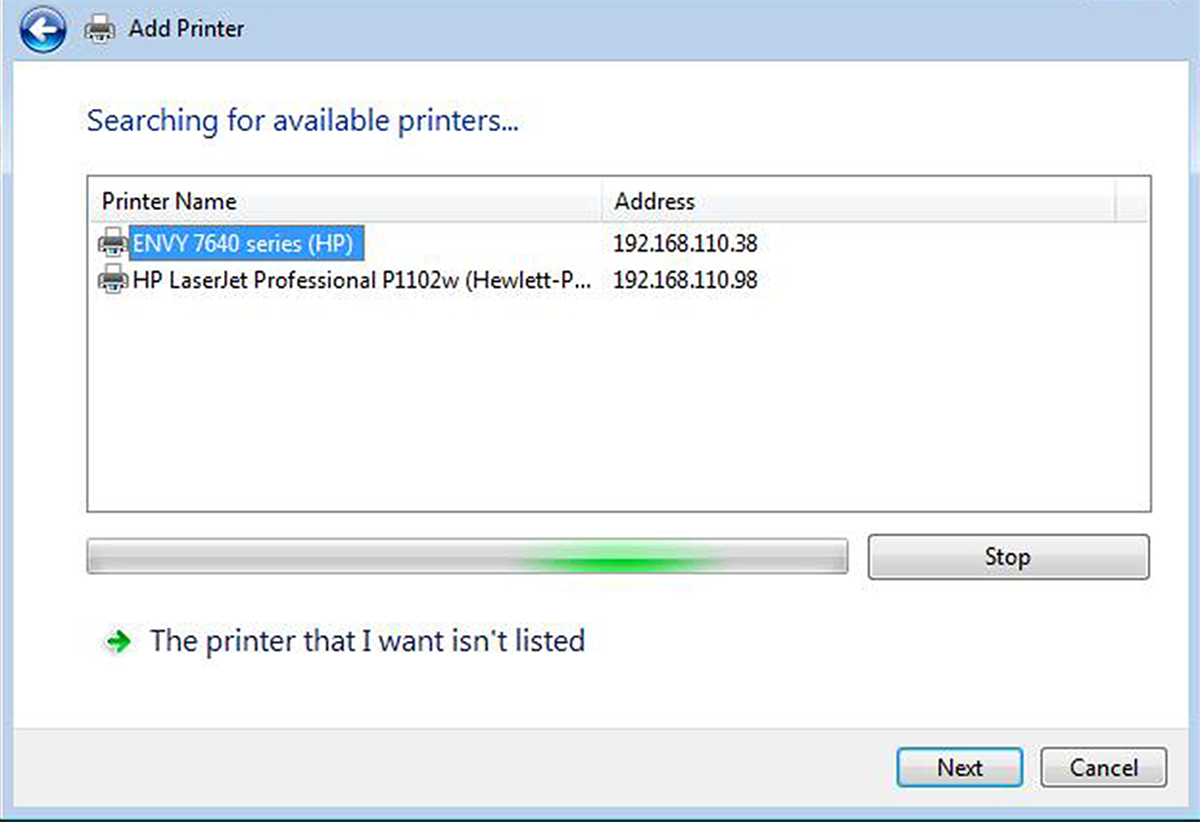
| 7. | Follow the onscreen instructions to search, locate and install your printer. Windows automatically searches for available printers on the network. |
If other devices are discovered on the network, connect to the printer with the matching IP address from step 2.
It is important that you install the printer driver files when prompted, during setup. Printer driver files may be supplied with the printer (e.g. CD or memory stick), or check the printer manufacturer’s website to download the files.
| 8. | Set the printer as the default printer. See Default Printer Setting. |
Use the following instructions (as a guide) if your printer supports direct connection, and you choose to connect the diagnostic tool directly to the printer.
| 1. | Turn your printer on and make sure it is setup per the manufacturers instructions for direct connection. The printer must be able to be wirelessly detected by the diagnostic tool. |
You can only connect to one network, therefore when connecting to your wireless printer, any other active wireless connection will be disconnected.
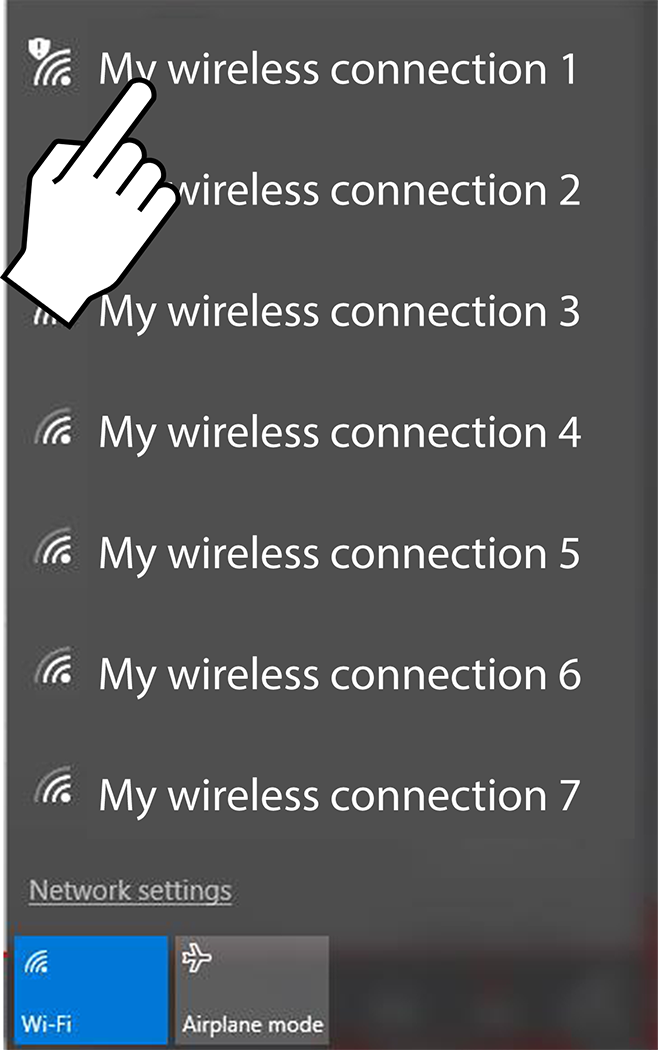
| 2. | From the diagnostic tool, click the Wi-Fi icon in the System Tray, or from the Diagnostic Suite lower toolbar . |
| 3. | Choose your Wireless Printer from the list of available networks, then select Connect. |
| 4. | Enter the security password for your wireless printer. See your printer documentation for details. |
A wireless network connection progress window displays as the connection is being made.
Once the diagnostic tool is connected to the Wi-Fi printer, follow these steps to install the printer:
| 5. | Select the Windows icon on the desktop (lower left). |
| 6. | Select Devices and Printers (right-side menu). |
| 7. | Select Add a Printer from the toolbar. |
| 8. | Select Add Network, Wireless or Bluetooth Printer”. |
| 9. | Follow the onscreen instructions to search, locate and install your printer. Windows automatically searches for available printers on the network . |
It is important that you install the printer driver files when prompted, during setup. Printer driver files may be supplied with the printer (e.g. CD or memory stick), or check the printer manufacturer’s website to download the files.
| 10. | Set the printer as the default printer. |
To set a default system printer:
| 1. | Select the Windows icon on the desktop (lower left). |
| 2. | Select Devices and Printers (right-side menu). |
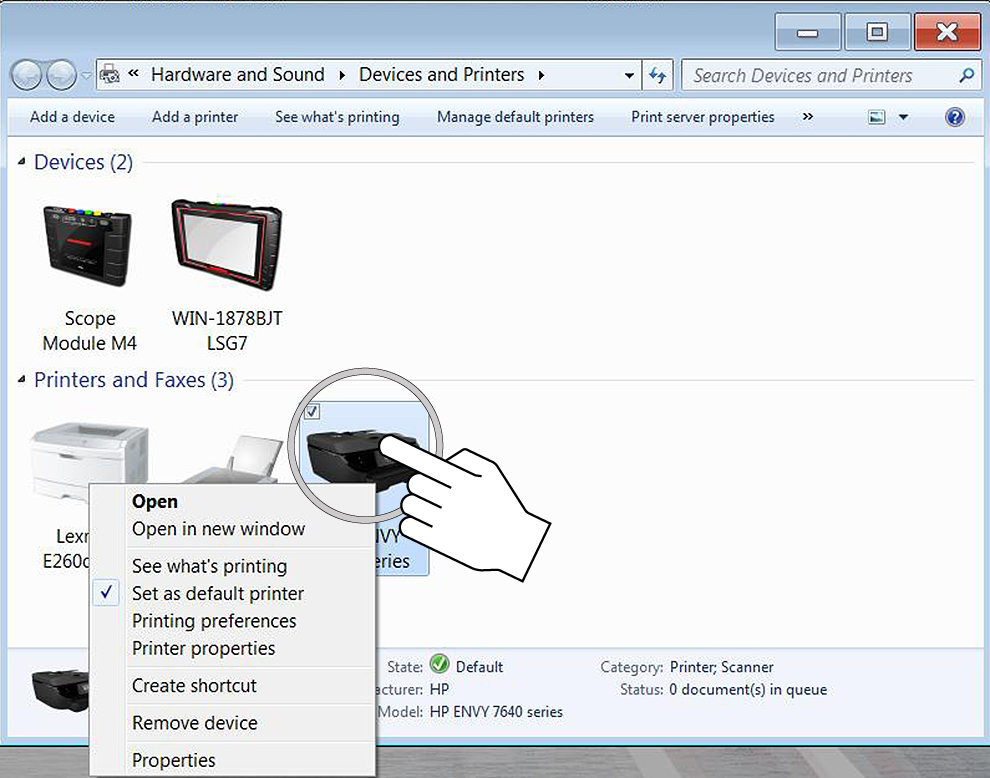
| 3. | Touch and hold the icon of the printer you want to set as the default, until the optional menu indicator (circle outline) appears and then release (this is also known as right-click menu). From the menu, select “Set as default printer”. When set, a check mark is displayed next to the option . |
The printer right-click menu, also provides access to other printer settings such as properties and preferences.
To print the Vehicle System Report, Adobe Reader must be installed.
To check if you have Adobe Reader installed:
| 1. | Check if the Adobe Reader shortcut icon is on the desktop, or |
| 2. | Select the Windows icon on the desktop (lower left). |
| 3. | Select All Programs from the menu. |
Adobe Reader should appear near the top of the list (depending on what other software you have installed).
To install Adobe Reader:
| 1. | Visit: adobe.com, or get.adobe.com/reader/ |
| 2. | Follow the instructions to download and install the free version of Adobe Reader for Windows. |
Deselect any options such as “Install Acrobat Reader Chrome Extension”, or install optional security, etc. Only Adobe Reader is needed.
Snap-on System Restore is a program that allows you restore the diagnostic tool operating system software to the original factory setup, in the event of a failure. Running the program replaces all “C” drive files with the original factory files and settings.
It is important to understand that ALL files on the “C” drive will be deleted when performing a restore. Performing a restore will restore the Windows operating system to the original factory setup, however the ShopStream Diagnostic Suite will be restored to the same version that was installed at the time the restore was performed.
Transfer all files (e.g. personal files) off of the “C” drive that you wish to retain BEFORE performing the system restore, as all files on the “C” drive will be deleted. To backup saved files created in the ShopStream Diagnostic Suite (e.g. engine data, scope recordings, or image files) see Data Backup.
To restore the operating system
| 1. | Turn on the diagnostic tool. |
| 2. | During boot-up wait for the “Loading software, please wait…(Press the S Button if you need to restore unit)” message to display, then press the Shortcut (S) button. |
| 3. | Select System Restore to restore the system to its original state at the time of purchase or select Exit to exit and restart system normally. |
| 4. | Ensure the device is connected to a power source and nothing is inserted in the USB inputs, then select BEGIN to restore to the initial state of the device or select CANCEL to exit and restart system normally. |
A progress indicator displays while the files are being restored.
| 5. | Select RESTART to finish the system restore. |
The diagnostic tool shuts down, then reboots and the system recovery portion of the operation begins. Follow any on-screen prompts.
The diagnostic tool shuts down and reboots a second time. When the Home screen displays, the procedure is complete and the diagnostic tool is ready for use.


